What you need to know about concrete joint filling
If you ever spend time in a Costco, Sam’s Club, Walmart, or essentially any warehouse that has concrete floors you may notice gaps in the concrete. These gaps (commonly called control joints) are intended to prevent the concrete from breaking down prematurely. Without them, the concrete will fail and cause later issues.
Concrete may look very stable, but in reality, it is constantly changing in size. The most common changes are temperature, humidity, and the curing age of the concrete. If a concrete slab is poured in too big of a slab with no breaks/gaps, this puts a lot of stress on the concrete as it shrinks and expands. You will start to see unsightly cracks in your newly poured concrete. A concrete contractor will therefore make sure there are a significant amount of gaps or separated concrete slabs to allow for this fluctuation during its life. This can be done by pouring concrete in desirably sized slabs or cutting with a joint saw.
In many ways, these gaps are not ideal in any circumstance; they are not ideal in a location where water can get into those gaps and freeze, high traffic areas where they can chip or catch on machinery, or simply become an area where debris can fill the gaps. In these types of circumstances, we want to use a joint filler. A joint filler can be used to fill these gaps all while allowing the concrete to shrink and expand as needed, give structural support to the edges of the concrete, and prevent debris from filling the gaps.
There are two common joint fillers available: semi-rigid epoxy-based and semi-rigid polyurea.
Semi-Rigid Epoxy Based: These are a good choice when you need a longer working time due to slower dry times, or need better bonding in wet, damp, or contaminated areas. Semi-Rigid Epoxy-Based Fillers are also typically harder (higher durometer) than polyureas.
Semi-Rigid Polyurea: These are a good choice for a fast-drying option. Polyureas can typically be open to traffic within 1-2 hours of application. They are also a great choice for curing in sub-freezing temperatures. Typically have a longer elongation capability.
Steps To Concrete Joint Filling
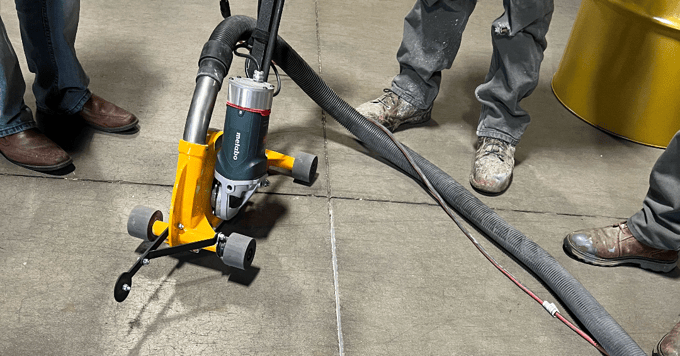
Step 1: It is ideal to get the cleanest joint possible before applying a joint filler. This can be done by using a high-powered vacuum or using a joint saw to clean out the joint before applying the filler. Using a saw will get you the cleanest, contamination-free surface for the joint filler to adhere to.
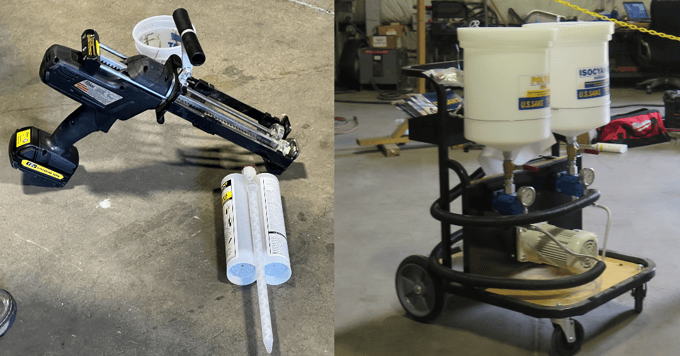
Step 2: Use a Pump or cartridge to fill the joint. Pumps offer large-scale usability at an affordable cost. Cartridges are meant for smaller jobs but are easy and convenient to use. With both options, a chemical reaction will take place by mixing two chemicals together upon application.
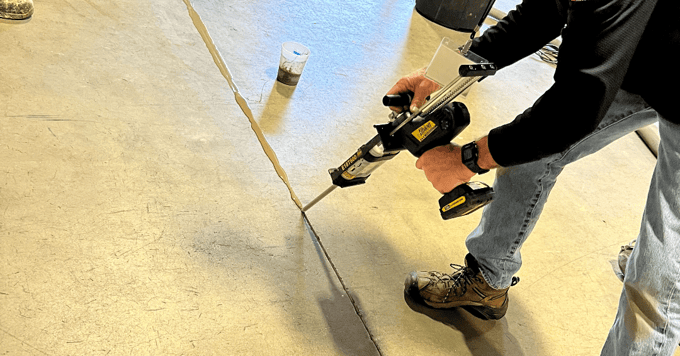
Step 3: Plan out your path. Start in a corner or against a wall and make sure your path is clear. Depending on the joint filler, it can dry quickly. Therefore, you want a clear path so you don’t need to stop as you apply.
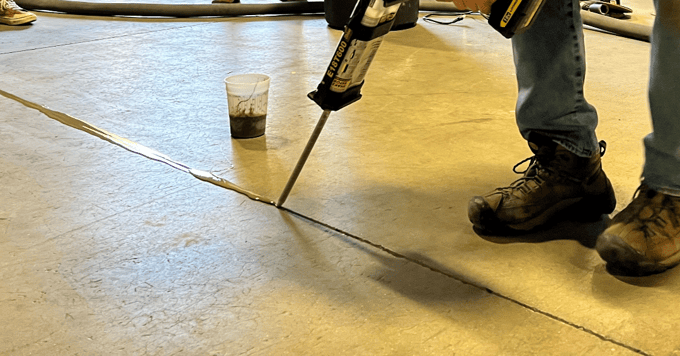
Step 4: Fill joints with the filler. Make sure to overfill the joint. This will allow the joint filler to fully adhere, and fill in any imperfections along the surface. In some cases where the gap may be really deep, you may need to use a filler such as sand to fill in the bottom of the gap. This will help keep costs down and not use the joint filler in large volumes.
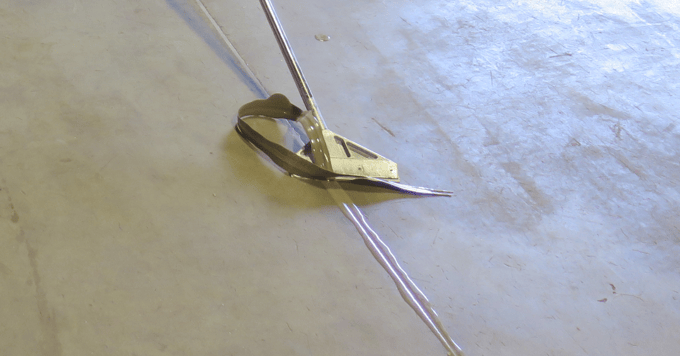
Step 5: After the joint filler is dry, use a razor to cut the excess off the top. A telescopic scraper paired with an 8” razor is perfect to get the job done. This will leave you with a flush surface on the concrete. As simple as that sounds, it is important to get a clean cut across the entire surface. If the cut is not flush with the cement, it could cause machinery or other objects to catch and get stuck on the joint filler.
Enjoyed reading this post? Read the following articles:


Featured Products
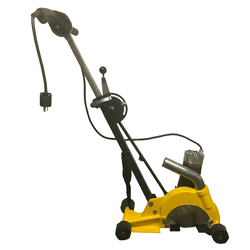
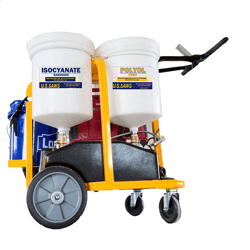
U.S. Saws, One Man Polymer Pump
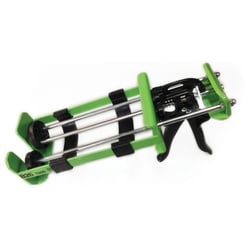
Metzger/ McGuire, Cartridge Pump Gun, Dual, For Use With 900 ML Cartridges
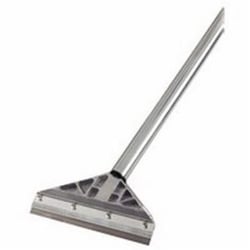
Razor Scraper, Telescopic, Aluminum, 8"