Have you wanted polished concrete in your garage, warehouse, restaurant, store, or in your house?
Polished concrete has increased in popularity in the last couple of years and its enormous appeal is expected to continue in the future. The main reasons for this increase are its beautiful aesthetic, its ease of maintenance, and its cost-saving floor.
In this article, we will discuss the process that is required to get a glossy mirror-like finish, along with practical industry advice. We will also give you suggestions on the quality products needed to complete a polishing job with ease.
Note that the following will work for most if not all jobs. What will work for you is dependent on many factors. Concrete by nature is very different based on the region of the world it is created, age, and its material makeup.
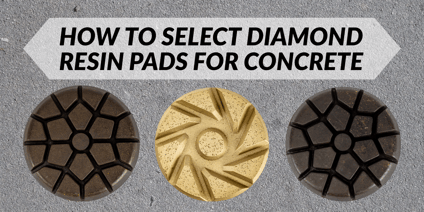
Step One: The first step of a concrete polish job is to examine the concrete you are going to be working on. You need to determine how hard the concrete is in order to determine what kind of diamond pads you will use. Diamond pads come in different hardnesses of bonds. The harder the concrete, the softer the bond you need because you always want the sharpest and newest diamonds to be in contact with the hard concrete.
- If you use a hard-bond diamond, the bond would not wear away quickly enough to expose the diamonds, causing the diamond pads to glaze the surface and not sufficiently grind or polish the floor.
- If you use a soft diamond on soft concrete you will achieve the right results, but your diamonds will wear out quickly, costing you extra money. In most cases, a medium bond will be a good diamond pad to cover all bases, but you will need to test to make sure you have an appropriate bond. A simple test can save you hours of time and hundreds of dollars.
To determine the type of concrete you will be working with you will need to use a Mohs Hardness Test kit. The pics in this kit range from 2-9. You will choose the appropriate pic and gently press it on the concrete as you attempt to scratch it. You will keep changing pics until you get a scratch. This will tell you the hardness of the concrete.
As a general rule, you can use the following to base which bond you need for the concrete hardness.
Mohs 7.5-9: Use Soft Bond – Mohs 4.5-7.5: Use Medium Bond – Mohs 2-4.5: Use Hard Bond
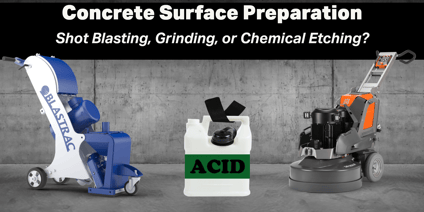
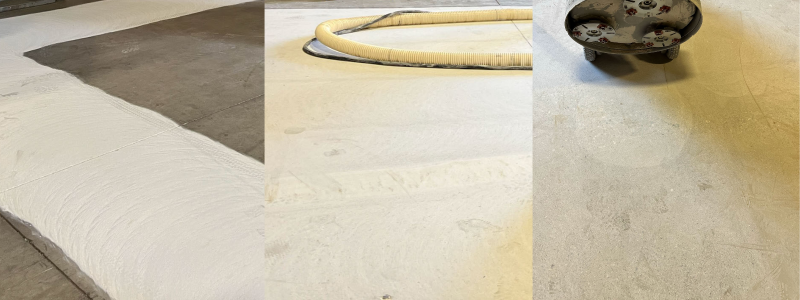
Step Two: Start the polish process by prepping the concrete. In this step, you will use a metal diamond pad. Metals are diamond tools that are typically low grit and use a metal bond to hold the diamonds in place. These are meant to be aggressive so that they can even out the concrete and remove the topcoat of concrete. This is necessary to remove any imperfections in the concrete, glues, paints, epoxies, stains, blemishes, etc. The goal is to try and create a surface that is uniform.
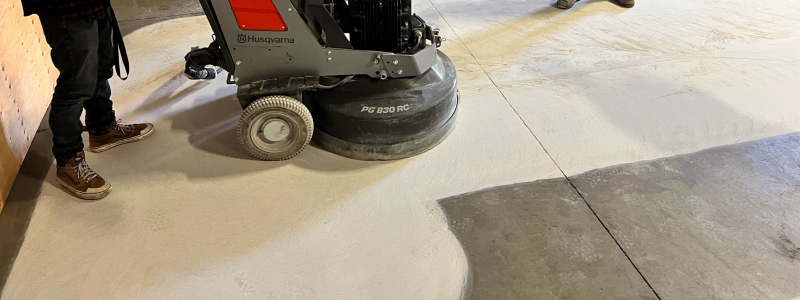
This process can be accomplished in a number of ways. What grit you need and how many passes you make will greatly depend on the state of the concrete. The following grits and passes provide a reference point, but every job site will be a little different.
First pass: 30 Grit Metal Diamond Pad
Second Pass: 70 Grit Metal Diamond Pad
Third Pass: 120 Grit Metal Diamond Pad
Your passes with metals will increase in grit as you complete each pass. Each pad will remove the scratches of the previous pass.
Step Three: Next, we move to a hybrid pad. A hybrid is commonly composed of metal, resin, or ceramics. As mentioned in the previous step, the grit consistently increases to help remove the scratch pattern from the last diamond. Hybrid pads essentially perform the same function but are designed to really help remove the scratches of the aggressive metals.
Fourth Pass: 100 Grit Hybrid Diamond Pad
Fifth Pass: 200 Grit Hybrid Diamond Pad
Step Four: Apply a concrete densifier. A concrete densifier is a liquid chemical that is spread evenly across the concrete slab. Its main purpose is to fill in the tiny porous holes that are formed in concrete. Our goal is to create a strong, solid floor. If there are a lot of porous holes you won't get the shine you want, nor will you get as strong of a slab of concrete. Holes will cause deterioration over time, causing the floor to wear out prematurely. A densifier will interact with the dust on the floor to help solidify the concrete and fill in those small pinholes. This also helps strengthen the concrete and transforms it into a long-lasting floor.
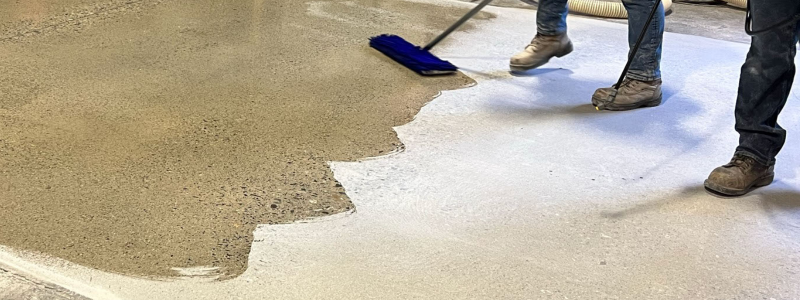
Note: Although we have put this in Step 4, this is not always the case. Keep in mind that the application will greatly be determined by the age of the concrete, which part of the world you live in, or the raw ingredients of the concrete. Therefore, this step makes it hard to determine the right time. In a perfect world, this would be a great time to apply the densifier. You should have removed most of the scratches, and are now about to start the polishing and getting that glossy finish.
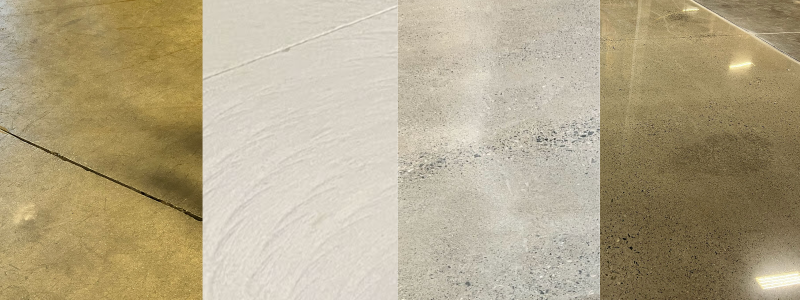
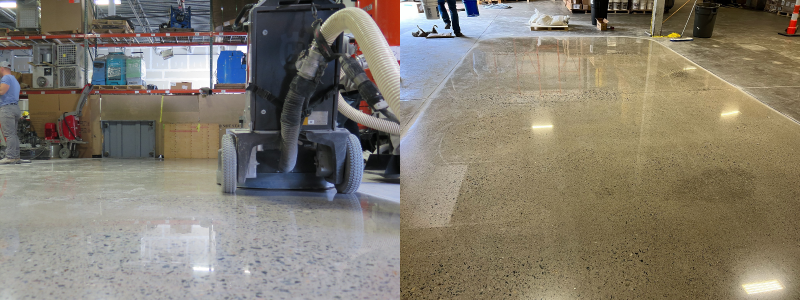
Step Five: After you have used a hybrid, you should have removed most of the large scratches and are now ready for the actual polish process. This is where the shine will start to come through on the concrete. You will now switch to a resin pad. Resin pads are designed to polish. A resin is a popular choice for concrete polishing which is made of poly-phenolic and ester-phenolic materials.
.png?width=859&name=scratch%20copy%20(1).png)
Sixth Pass: 400 Grit Resin Diamond Pad
Seventh Pass: 800 Grit Resin Diamond Pad
Eighth pass: 1500 Grit Resin Diamond Pad
After this last pass, you will have a certified shine and polished concrete. If you desire additional shine, you may go to a 3500 grit. In addition, there are several other grits that can be used depending on your job situation. Be aware and ready to have the diamonds on hand for any unexpected situation you may come across on the job site.
We offer a complete package with all the included machines, diamonds, and densifier to complete any job. Check it out here: Stonecrete Polsih Package.

Enjoyed reading this post? Read the following articles: